Enjoy! Airport Madness: World Edition releases on November 15th!
Teaser Video: Airport Madness in Vancouver, BC Canada
Leave a reply
Enjoy! Airport Madness: World Edition releases on November 15th!
Enjoy! I intend to release this game on November 15th. I might offer a “pre-release” of the game sooner, offering buyers the unfinished beta version a little early… we’ll see!
I’ve always wanted to do a step-by-step of my projects. Here’ s the making of Airport Madness: Honolulu!
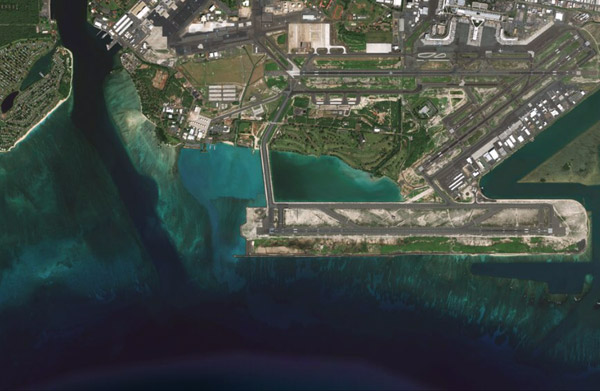
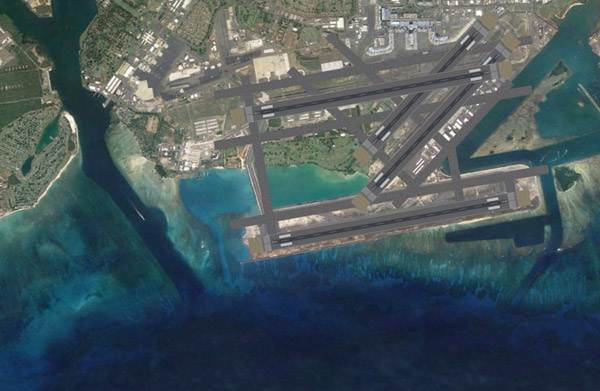
Google Earth image of Honolulu airport.
It all begins with me scouring Google Earth for airports that look fun. I usually look for one that has at least three runways, preferably crossing one another.

My beautiful artwork, representing the plan for Honolulu.
Once I have found an airport that I like, I open up my favorite iPad app Paper, and start doodling. I need to figure out a traffic flow that makes the game interesting, yet won’t allow airplanes to jam up nose-to-nose.
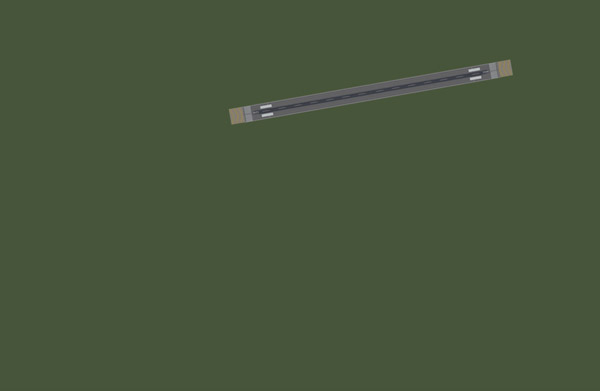
It all starts with the very first runway.
The next step is to construct a nice, pretty runway. I size it to match the real-world Honolulu Runway 08L, and set it into it’s correct position. Because screen space is so limited, I choose what corner of the image the airport shall be located. This depends on where arrivals will come from. In Airport Madness, departures are seldom very visible.
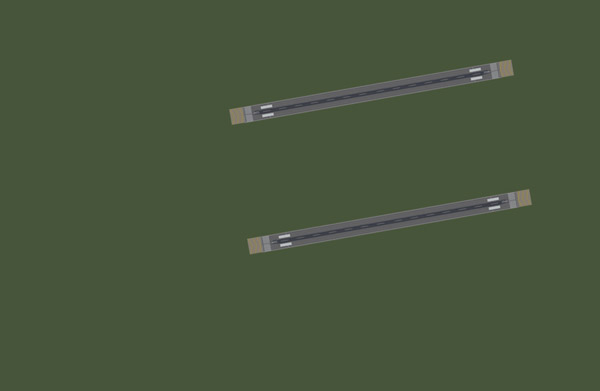
Adding the second runway.
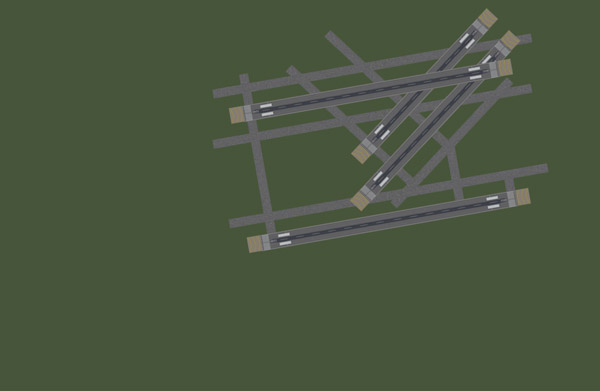
Taxiways added.
This is where my version of the airport departs reality. In reality, there are 30 different taxiways that go every which way. In order for it to be a straightforward, enjoyable game, I tidy it up by using only a few taxiways. I will sometimes add a taxiway in order to make the operation feasible.
My stuff, laid over top of the Google Earth image.
In order to create a shoreline, I need to stick the airport on top of the Google Earth image. I then trace the shoreline very carefully, sometimes creating or destroying earth to make my airport work.
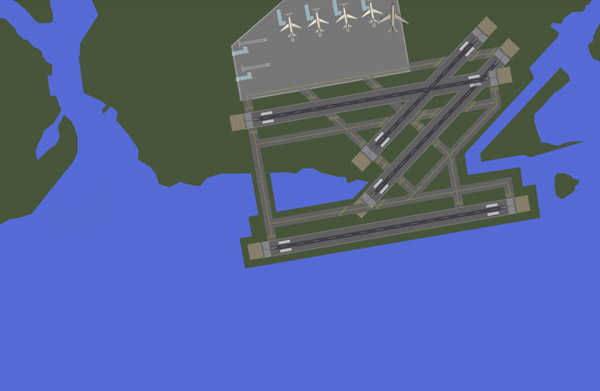
Everything is in place! Now it gets sent to the artist.
After just four short hours, I have everything in place. The map is exactly the shape that I want. It just needs an artist’s touch…

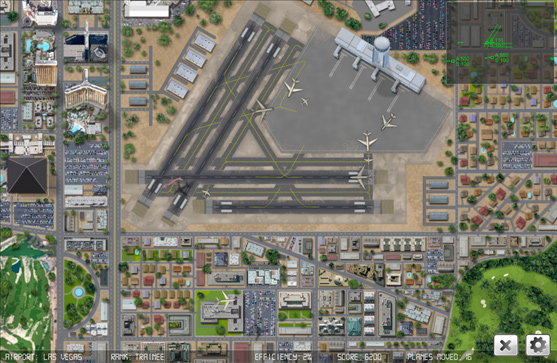
Final artwork!
After 20 hours of work by the artist, the map is complete!
As the release of Airport Madness: World Edition fast approaches, I’ll try to keep you up-to-date with screenshots, videos, and feature information. As always, your feedback is greatly appreciated. I answer every email that I receive. For the full-size version of this image, check out the product page.
Check it out!
One of my biggest pet peeves with the internet today are these blog posts people make, where they apologize for not blogging. They write 15 paragraphs about how their lives have been unmanageable, and blogging was their last priority. Hey, if you’ve got nothing to say, say nothing! No apologies, please.
Yeah, I haven’t blogged lately. But the good news is I’m making fabulous progress on Airport Madness: World Edition. I’d show you some screenshots, but the current hold-up is the artwork.
Our previous artist is not available for this project. It’s been a challenge for us to find someone with an artistic style that matches our game needs. Heck, I even tried going at the artwork myself (Airport Madness 2, anyone?). Fortunately, we should have something cool to show off in about a week.
On the back end, the game is in terrific shape. Five levels, assignable departure and arrival runways, and different game modes. The game modes come in three flavors: “Building Traffic”, “Continuous Play”, and “Time Trial”. I’ve done away with the concept of “dragging arrivals to a new runway”. Now, there’s a Runway Change button that you click (or tap). Dragging is only used to assign a vector (fly in a particular direction). I may even remove the “Go Around” button, as a controller can just drag-to-vector if a go-around situation occurs.
Our airports mimic the real-world airports (with a little Madness mixed in). Scenery will be detailed, like it was in recent versions of Airport Madness. This is a plus for those who want the game to feel “real”, but it does make the airplanes harder to see. I may include an option to show “AM2 Green” as an alternative to the pretty scenery.
The plan is to launch AM6 in November with 5 airports, then one additional airport per month (until the game gets so big that it explodes). I’ve thought about the best way to monetize this (gotta pay myself, right?) while being fair to you, the consumer. I figure, the game should sell for the usual $9.99, and the additional airports will be free updates. Here are the five airports that made it into the November release:
The game industry has become incredibly challenging. When I launched Airport Madness 1 with it’s single airport in 2008, $6 was a bargain. Nobody even batted an eye when I upped the price to $9.99 for Airport Madness 3. That’s because paying $9.99 for a game was a perfectly normal thing to do. Nowadays, games need to be mobile, they need to cost 99 cents, and they’d better be awesome.
I don’t feel pressured by all the free apps out there, as these have become stuffed with in-app purchases, and I think we’ve all figured out that “free” is not really free anymore. But I do see how people would be reluctant to pay $9.99 for one of our games. I’d be reluctant to build them for any less, however. They sure aren’t easy to build. So, all I can do is stick the usual price tag on the box and hope that my followers will see the value in our niche games.
In summary, I’m still plugging away at the game, still promising an imminent release. Thank you to everyone, especially those who have bought the first five versions of this game. This will be the last 2-D “top down” version of Airport Madness. The time has come to go 3-D! Having said that, I may publish a 2-D “ground control” version of Airport Madness next year.